
Set up your organization
An organization is the issuer behind your credentials. Submit its details once, wait for approval, and use it when creating events and courses.
What to prepare
| Detail | What to enter |
|---|---|
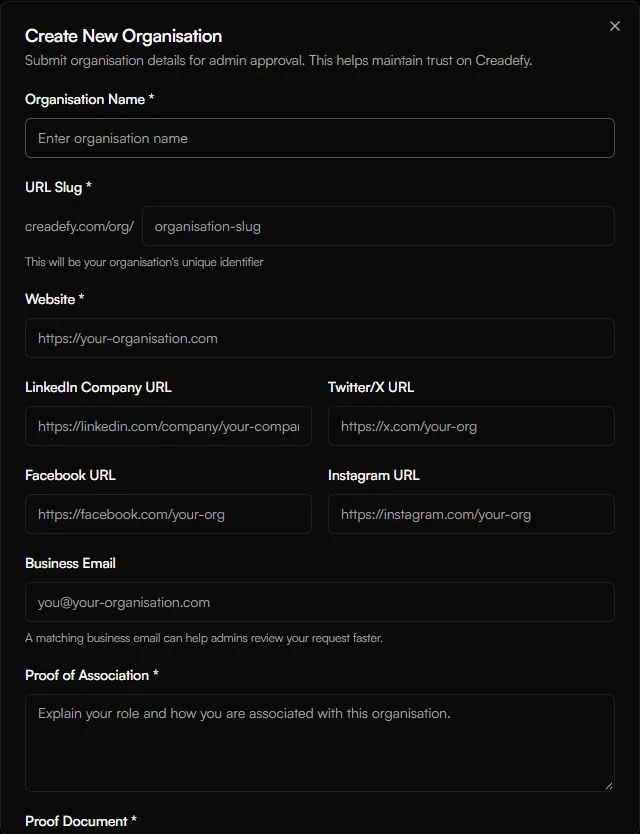
| Organization name and slug | Use the name recipients recognize. The slug becomes your organization URL. Use lowercase letters, numbers, and hyphens. |
| Website | A public website that explains who your organization is. Include https:// in the address. |
| Proof of Association | Explain your role and why you can issue on its behalf. Write at least 20 characters, with enough context for someone outside your team. |
| Proof Document | An ID card, employment proof, or official document showing the association. PDF, PNG, JPG, or WebP; up to 10 MB. |
| Optional public details | Business email and social links. A matching business inbox can help with review. |
For example: "I manage training at Northstar Learning and am responsible for issuing completion certificates for our workshops." Use your own role and organization details.
Submit for approval
- Open Organization in the dashboard. Open the organization switcher and choose Create organisation.
- Complete Create New Organisation. Check the website and slug before uploading the proof document.
- Select Submit for Approval. Submitting a request is the start of the review; it does not immediately approve your organization.
While your request is reviewed
The organization page shows the request moving through Submitted, In review, and Approved. Check the status on this page while the team reviews your details.
Use that time to design your template and prepare your recipient file. Approval is required before the organization appears in the event or course issuer list.
If the request is declined, read the reviewer's note under Your request wasn't approved. Check Your submission, fix the missing or unclear information, and use Submit a new request.
Verify your organization email
After approval, open the organization's Email and Verification card. Under Organisation email, enter an inbox your team monitors, select Send code, enter the six-digit code, and select Verify.
Replies to certificate and badge emails go to this address. Typing a business email in the creation form does not complete this code check. Use an address that someone will answer when recipients ask for a correction.
Use Change deliberately when moving to another inbox, then finish verification for the new address. The optional Verified Organization badge also requires a verified organization email.
Work with your team
Use Team to manage access. An owner or admin can manage recipients, groups, and issuance for an approved organization. Members can view. The organization owner controls changes to the programme itself, including editing its details.
If a colleague can see a programme but cannot issue, check their organization role first. If the issuer is missing from a creation form, check both the approval status and whether that colleague is an owner or admin.
Keep organization names, logos, websites, and public links current. Recipients and verifiers see issuer details on credential pages, so these details should match the organization named in your design.